Train and sim-test your first policy on Laika
Train a walking policy for Laika on your own computer, then read how it did in simulation. About 15 minutes.
Prompt for your AI
Read https://mousemouse.ai/docs/first-policy.md first. Walk me through training and sim-testing my first policy on Laika. Run the terminal steps for me, and tell me what to click in the browser. Ask me before anything that costs money or moves a robot.You will train a walking policy for Laika, Lucen's 12-joint biped, on your own computer. Then you will read how it did in simulation. It takes about 15 minutes, and it costs nothing.
Every command here is tested. Where a command names this hub, it shows this hub's address: https://api.mousemouse.ai.
Before you start
- An account on this hub. Sign up with the button at the top right, and
choose your handle, your name in every address. This page writes it as
you. - A Mac or Linux computer with a terminal. The installer uses
uvwhen you have it, else Python 3.12 or later. - About 15 minutes. Installing takes a minute, and a quick run trains in two or three.
What you'll learn
- How to start a training run from the browser.
- How a runner on your computer trains it, for free.
- How to follow a run's curves and checkpoints.
- How to read a sim test: which tests pass, and why the others fail.
1 · Open Laika
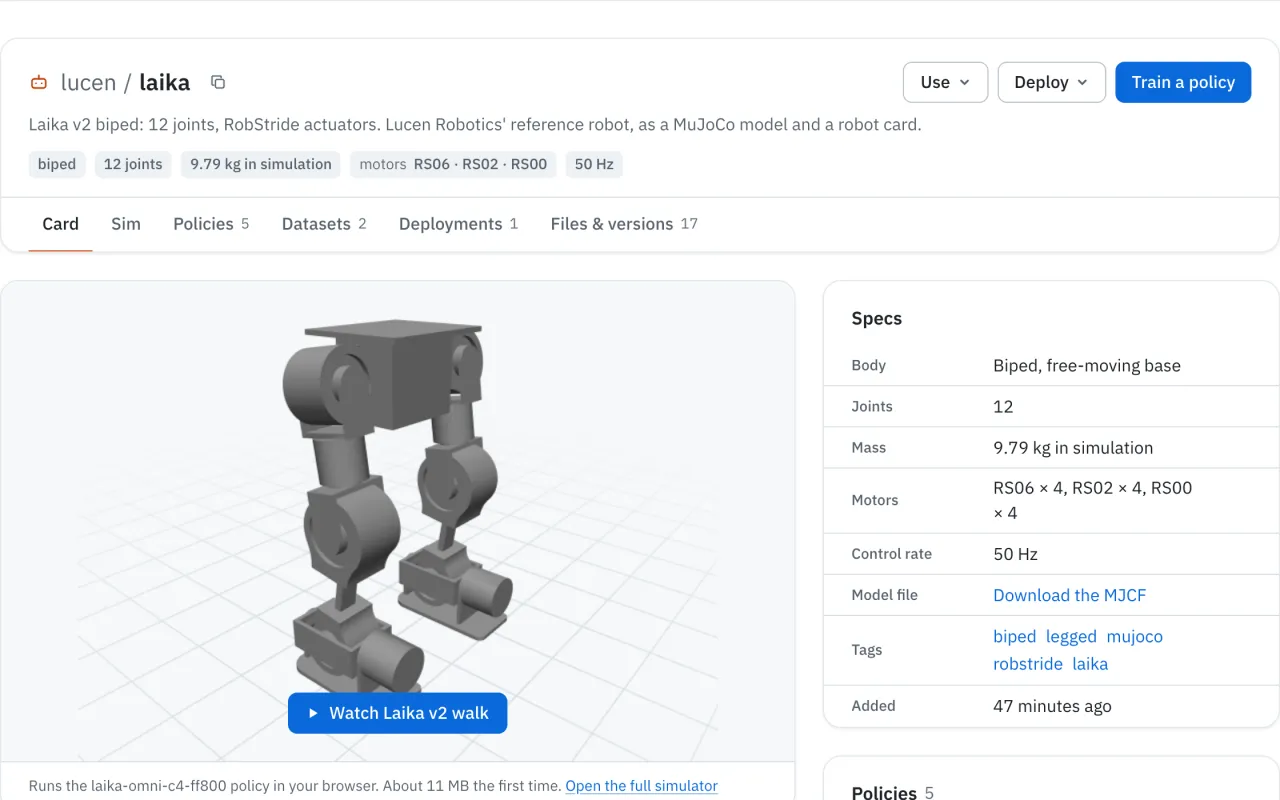
Open Laika's page and press Train a policy.
You'll see the training form, titled "Train a policy for laika".
Just signed up? The welcome screen's Try Laika in sim
The welcome screen after sign-up offers Try Laika in sim. It copies Laika, its real logs and a trained walking policy into your account. Then Run sim test scores that policy in simulation, free on Lucen cloud where this hub offers it. That tests a policy someone else trained. This tutorial trains your own, from Laika's page.
2 · Start a quick run
Keep MuJoCo PPO. Under How long, choose Quick test. Under Where it runs, choose My machine. Leave Test every checkpoint in simulation ticked, and press Start training.
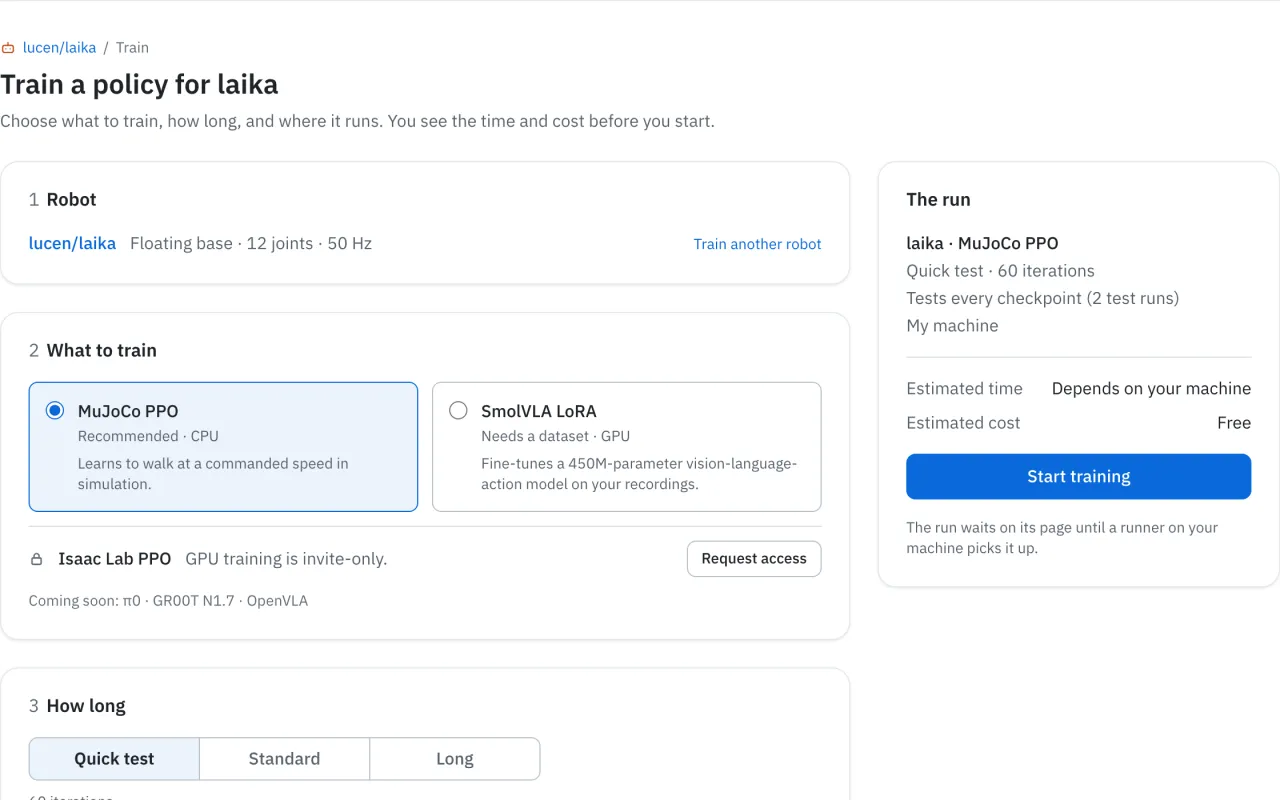
You'll see the run's page. It says Queued and Waiting for a runner, with four lines to paste.
If the form offers Lucen cloud CPU
Some hubs offer Lucen cloud CPU under Where it runs. Choose it to train without installing anything. It is free within a monthly allowance, and the summary shows the estimated cost before you start. Then skip to step 6 once the run says Succeeded.
3 · Install the CLI
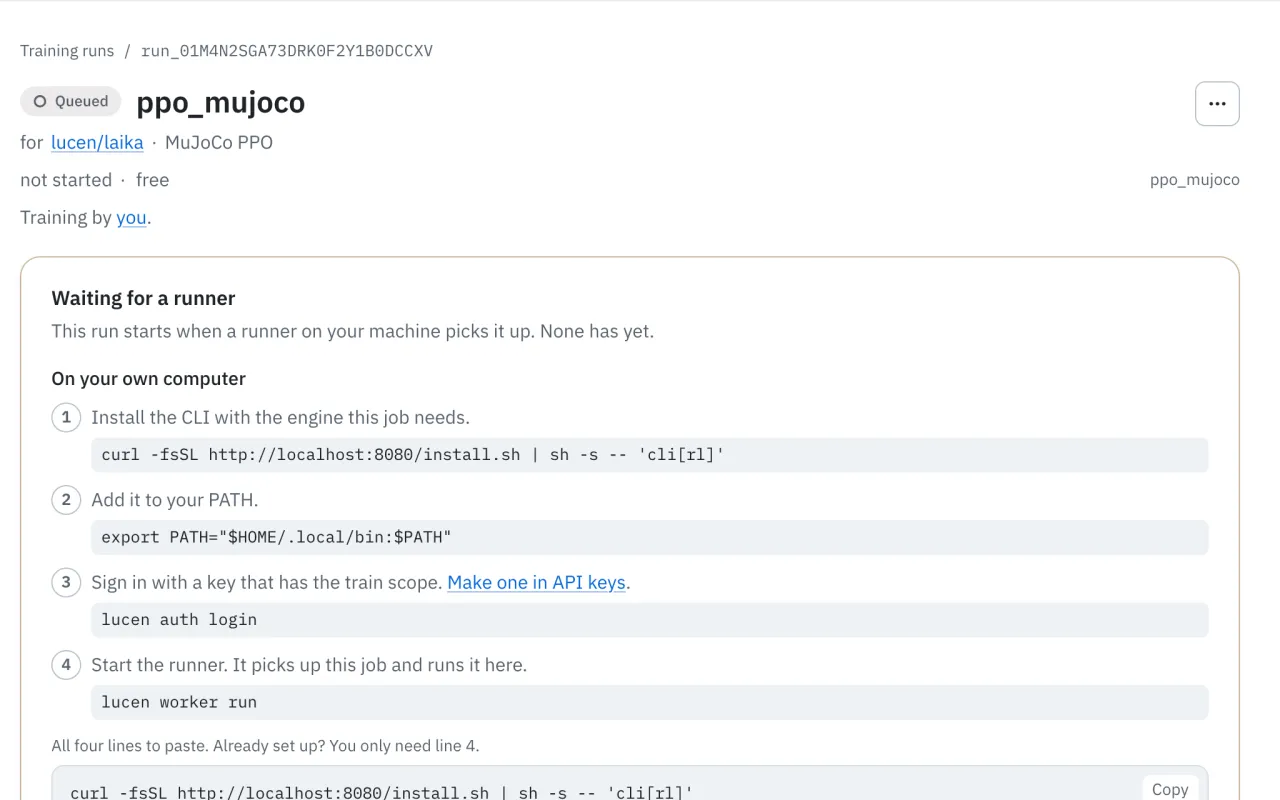
A runner is a program on your computer that trains your queued runs. It comes
with the lucen CLI. Open a terminal and run:
curl -fsSL https://api.mousemouse.ai/install.sh | sh -s -- 'cli[rl]'
export PATH="$HOME/.local/bin:$PATH"
You'll see the installer finish with:
Installed 1 executable: lucen
lucen-install: lucen and lucen-device now talk to https://api.mousemouse.ai (/Users/you/.config/lucen/credentials holds the URL, no key)
lucen-install: add /Users/you/.local/bin to your PATH: export PATH="/Users/you/.local/bin:$PATH"
lucen-install: next: make a key under Agents and keys on the hub, then run: lucen auth login && lucen quickstart
The second line puts lucen on your PATH for this terminal.
What the installer does
The installer fetches the lucen CLI from this hub, with MuJoCo and ONNX
Runtime for training and sim tests. The packages are not on PyPI, and a package
named lucen there is not ours. It points the CLI at this hub. It cannot change
the PATH of the shell it was piped into, which is why the second line is
there. Add that line to your shell's profile to keep it.
4 · Sign in with a key
The runner needs a key to act for you. Open API keys, name the key, choose the train scope and press Create key. Copy the key now: the page shows it once.
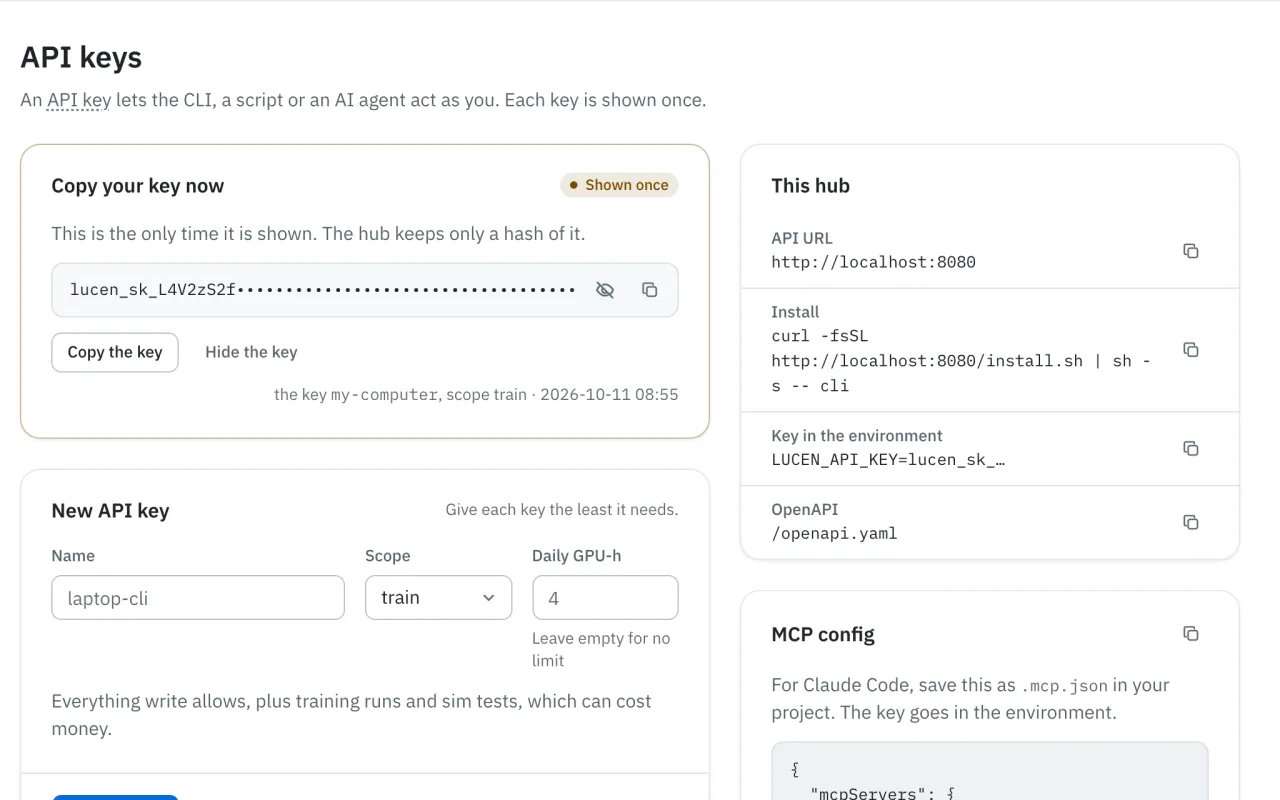
Then sign in, and paste the key when it asks:
lucen auth login
You'll see:
API key:
Signed in as you (scopes: read, write, train) at https://api.mousemouse.ai
Saved to /Users/you/.config/lucen/credentials (mode 0600)
Why a key, and what it can do
Only a signed-in person can create a key, so a key that leaks cannot create another. A train key can start runs and sim tests and spend money on Lucen cloud. It cannot approve a policy onto a robot: only a signed-in person can. The CLI keeps the key in a file only you can read. API keys and scopes lists what each scope allows.
5 · Start the runner
lucen worker run
The runner finds your queued run, trains it, and tests its checkpoints in simulation as they are saved. Leave it running.
You'll see something like this, shortened:
lucen worker `mac`: templates ppo_mujoco, smolvla_lora, stub_ppo, stub_serve_skill, stub_skill; looping
Claimed run_01M4N0N9N9CJV9H5W6QFB5WX4X (ppo_mujoco) as mac
  | [lucen-ppo-mujoco] 1024 envs x 24 steps x 60 iterations on 12 thread(s); dt 0.002 s x 10 = 50 Hz
  | iter    1/60  return   -0.510  reward/step  -0.01607  std 1.004     22,437 steps/s
  | iter   60/60  return   -2.429  reward/step   0.00931  std 0.674     19,142 steps/s
  | [lucen-ppo-mujoco] done: 1,474,560 env steps in 70.7 s; episode return -0.5097038764607732 -> -2.428927462479867
run_01M4N0N9N9CJV9H5W6QFB5WX4X: published you/ppo-mujoco-qfb5wx4x
run_01M4N0N9N9CJV9H5W6QFB5WX4X: sim test of step_60: 1 of 5 tests pass in 8.058 s (rollout_01M4N0SK53JAEFWRZKH5JYDZVG)
The run's page follows along. It says Running, draws the training curves, and adds each checkpoint to its strip as it is saved.
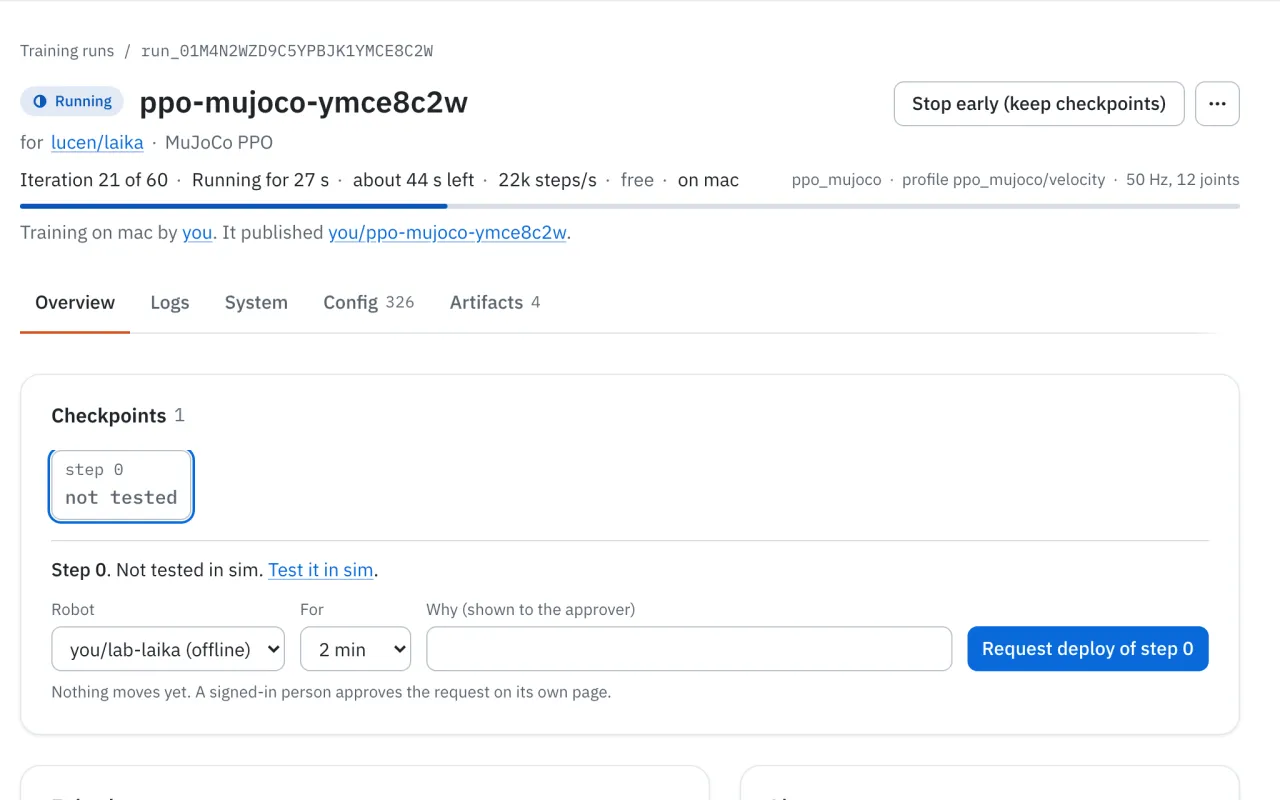
When the page says Succeeded, press Ctrl-C to stop the runner.
If the run does not start, or the runner stops
- The runner takes only the runs of the account whose key it holds. If it says nothing after "looping", check that you signed in as the account that started the run.
- If the runner stops mid-run, the hub queues the run again after five minutes without a heartbeat. Start the runner again and it picks the run back up.
- Training on your own machine is free. It uses your CPU, and a quick run takes about a minute and a half on a laptop.
6 · Read the sim test
On the run's page, each tested checkpoint shows how many tests it passed. Press 1 of 5 tests pass (yours may differ) to open the sim test.
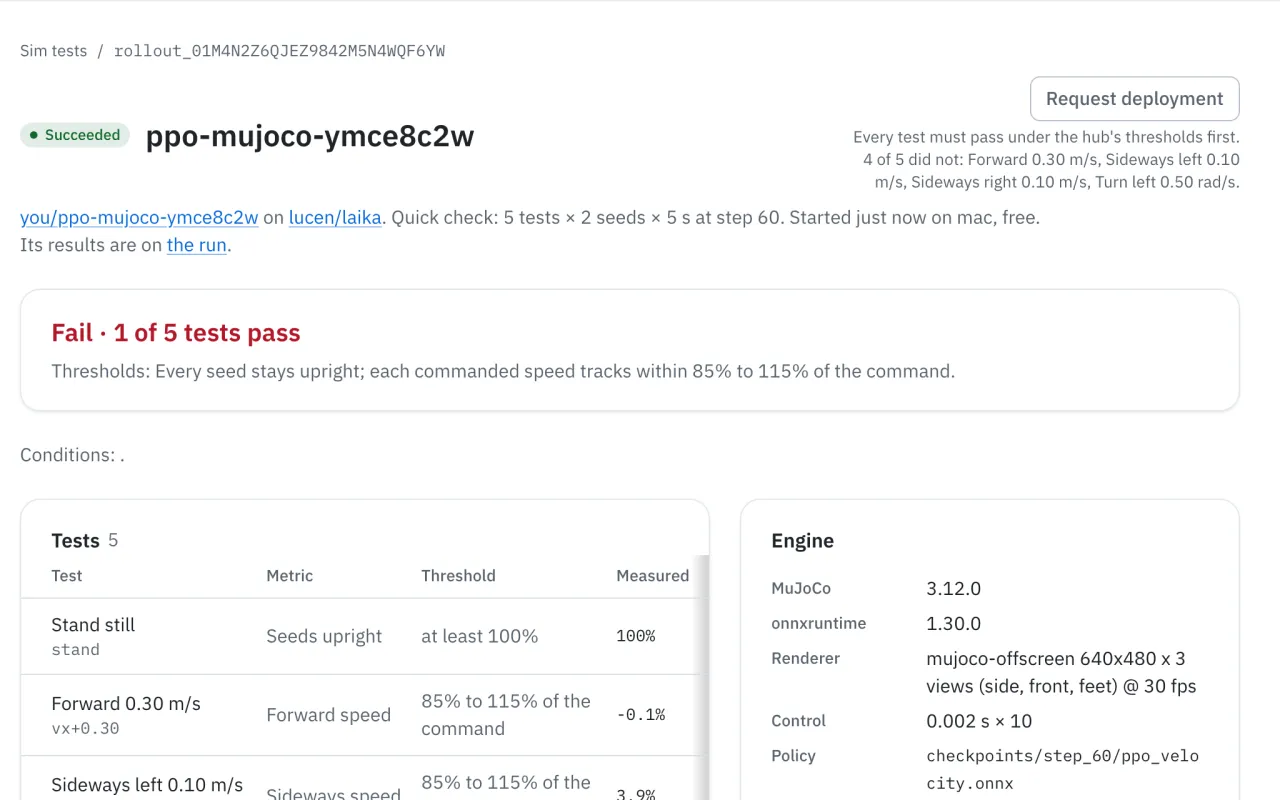
You'll see the result, then one row per test. A walking robot passes a test when every seed stays upright and tracks its command within 15%. After a quick run, expect Stand still to pass and the moving tests to fail. Sixty iterations is not enough to learn to walk.
Why the moving tests fail, and how to make them pass
Each test commands a speed, such as forward at 0.30 m/s, and measures what Laika does. A measured value near 0% means Laika barely moved. Train for longer to fix it. Long is 1,000 iterations. That is the run in which Laika first tracked a sideways command, about 16 minutes on a laptop. The sim test page also lets you try other thresholds, without running anything again.
Next steps
- Train for longer. Start another run with Standard or Long, the same way.
- Fine-tune it. On the run's page, Fine-tune starts the next round from a checkpoint that passed, with one thing changed.
- Ask the Coach. The Training Coach reads a run and suggests the next experiment.
- Put it on a robot. Deploy a policy to your robot, and read how approvals keep your robot safe.
- Bring your own robot. Add your robot, then train for it the same way.
- Run more jobs here. Train on your own machine covers the other runners and what each job costs.